You are using an out of date browser. It may not display this or other websites correctly.
You should upgrade or use an alternative browser.
You should upgrade or use an alternative browser.
Beginner tutorial: Character (rorbot) mod from scratch, in Blender
- Thread starter ohlidalp
- Start date
- Status
- Not open for further replies.
Before you do anything more export your character and try it in game. I think that you scale will be off and you should have your character facing +X not -Y
You're right:
- The orientation is genuinely wrong, it should be +X, not -Y
- The scale is correct but comes out wrong in the game because, for some reason, the game scales the mesh by 0.02. I disabled that and added a 'mesh_scale X Y Z' to the character file format, with default value 1.0 for every axis. I suggest you scale the classic rorbot down.
Step 44 - Make the animation exportable
According to blender2ogre manual on exporting skeletal animations (https://github.com/OGRECave/blender2ogre/blob/master/SkeletalAnimation.md), the animation must be "pushed to NLA stack" so that the exporter notices it. To do that, go to "DopeSheet" window, activate "Action Editor" context and press the "PushDown" button.
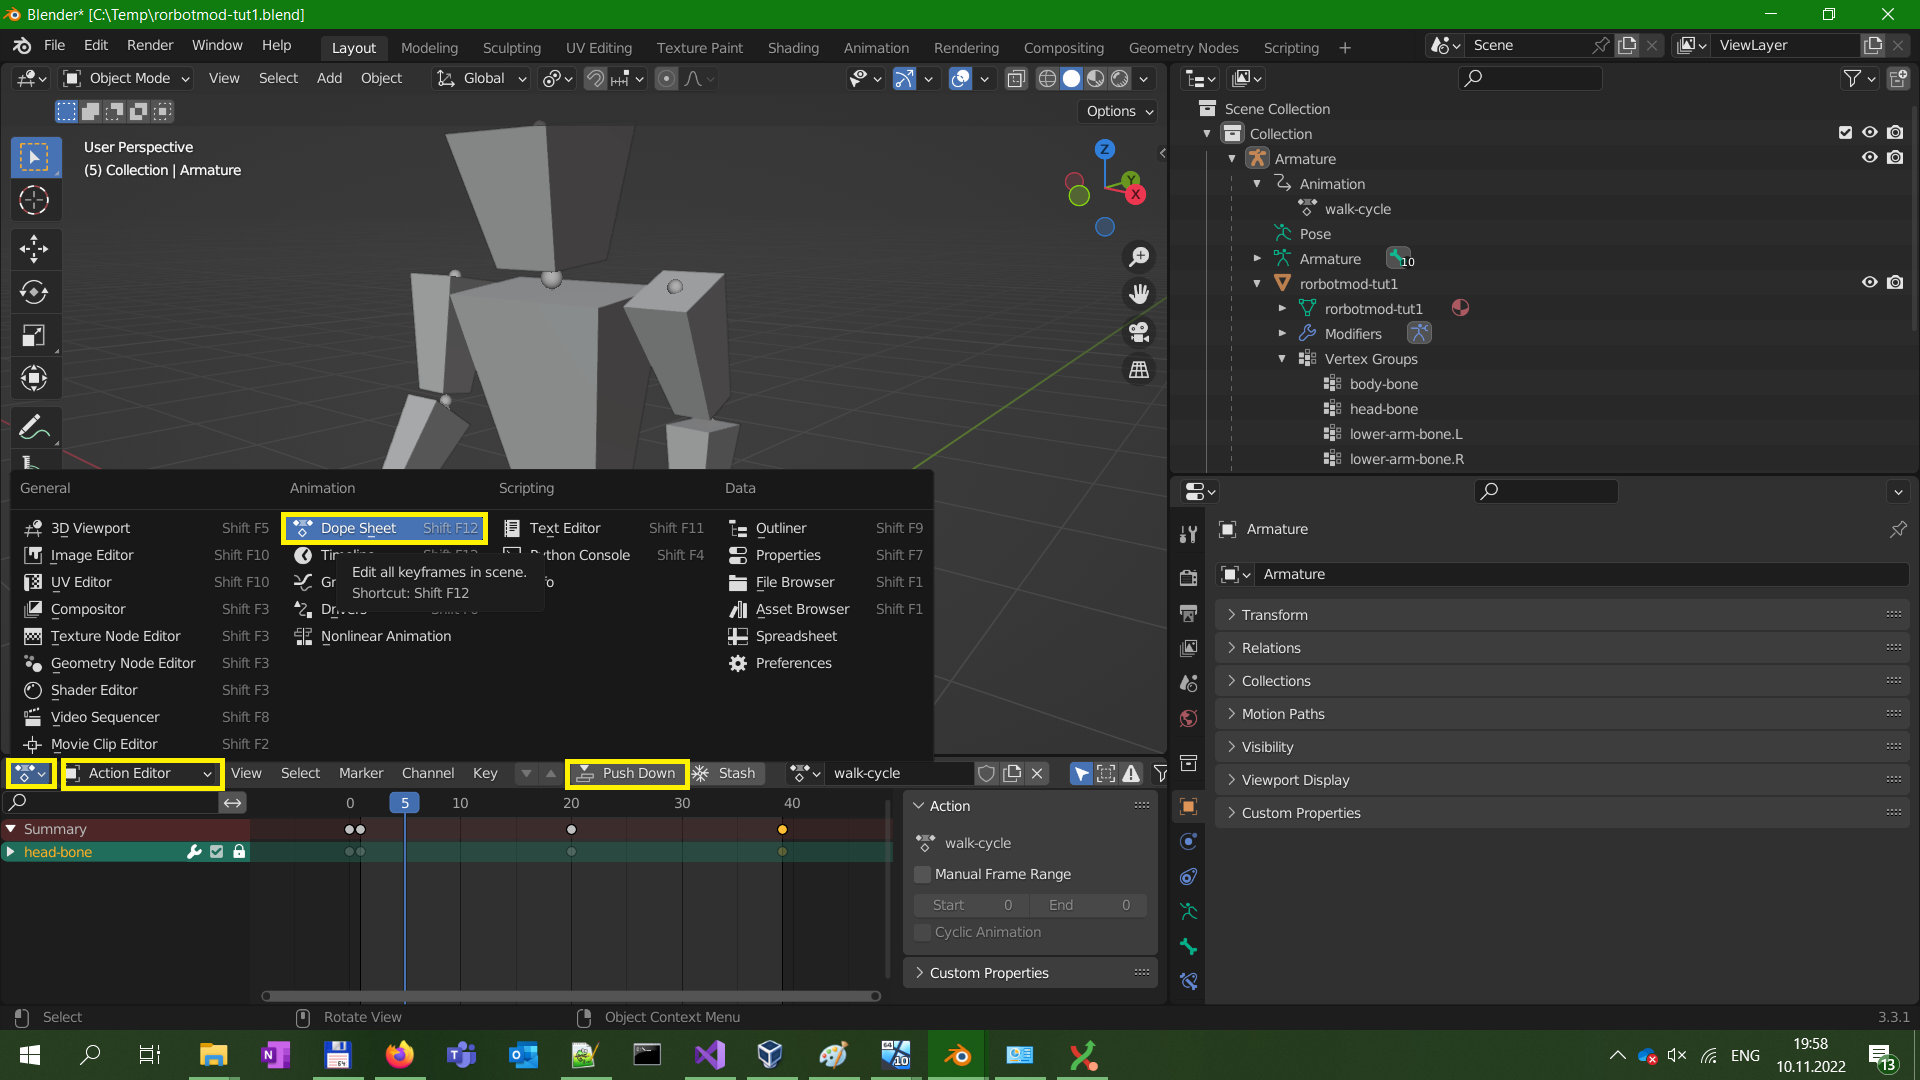
According to blender2ogre manual on exporting skeletal animations (https://github.com/OGRECave/blender2ogre/blob/master/SkeletalAnimation.md), the animation must be "pushed to NLA stack" so that the exporter notices it. To do that, go to "DopeSheet" window, activate "Action Editor" context and press the "PushDown" button.
Step 45 - Show normals
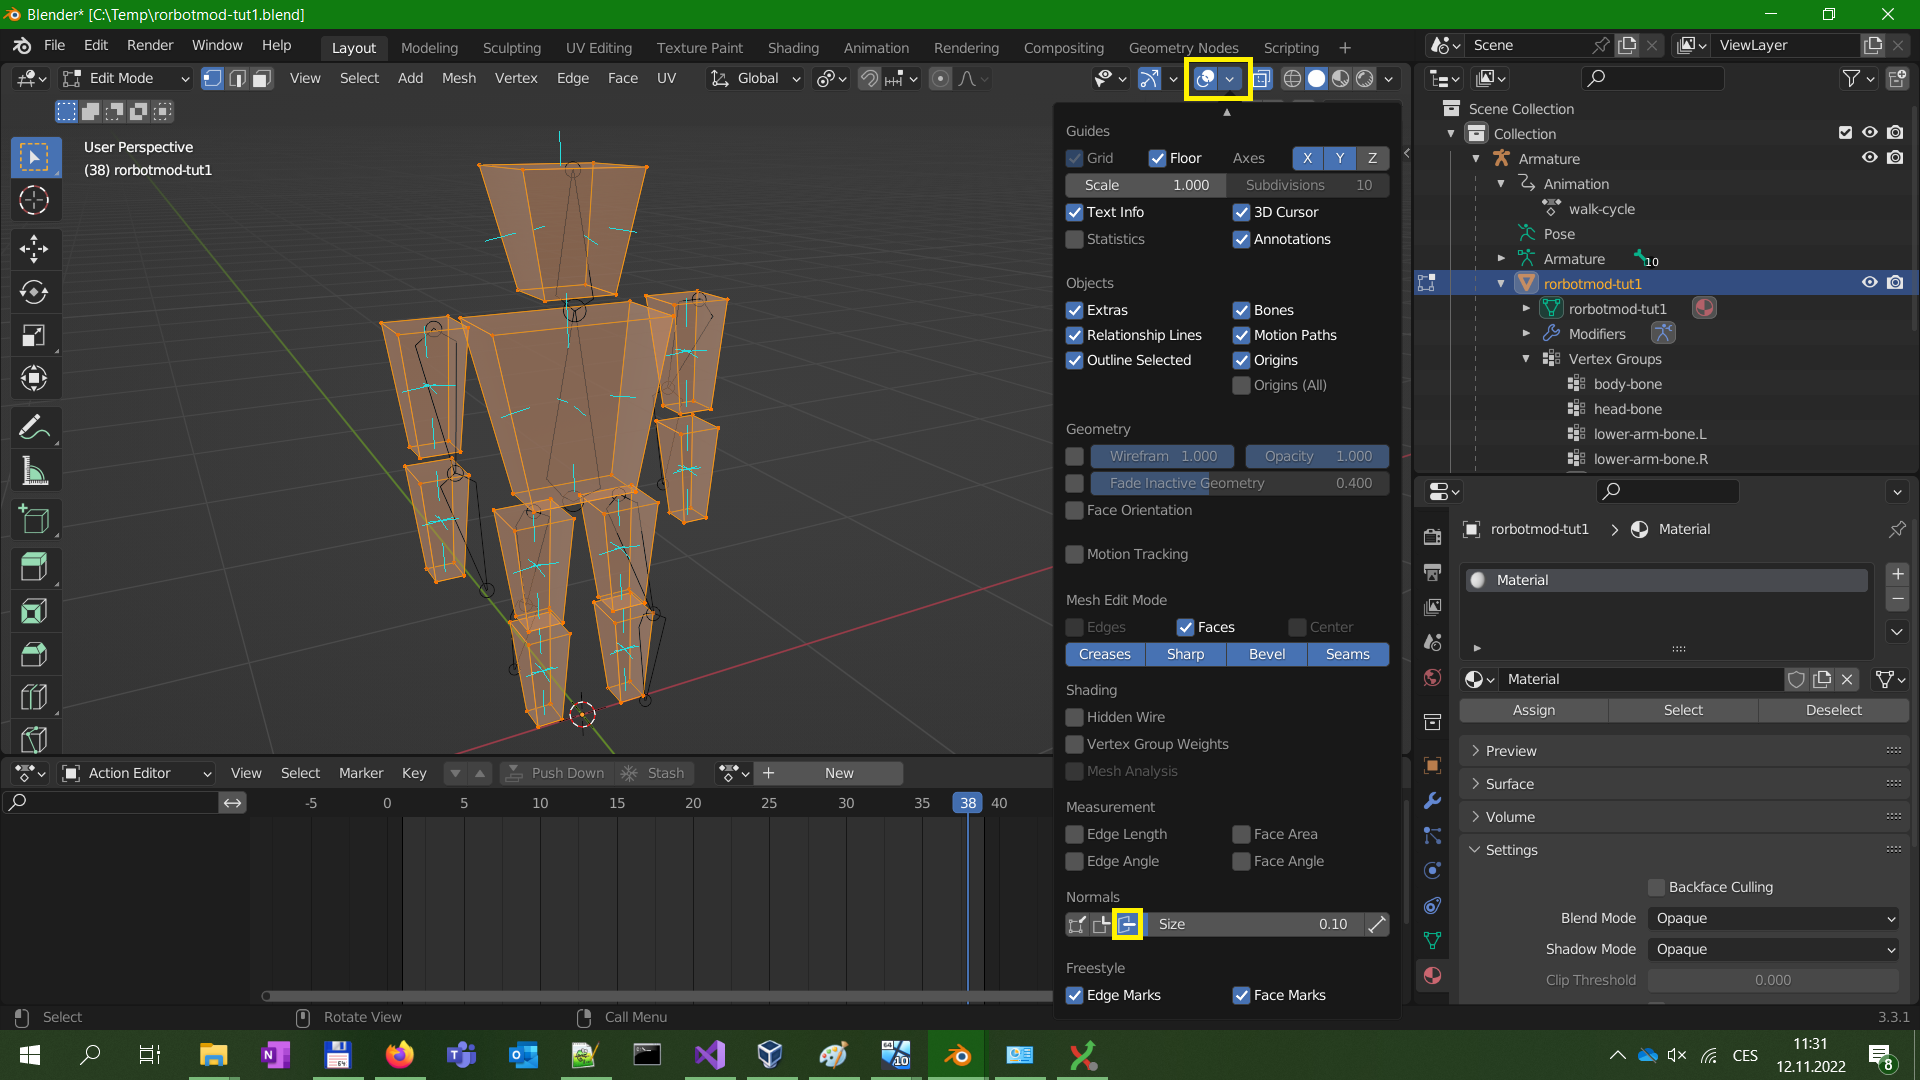
In 3d graphics, "a normal" is a direction which an element is facing. A face normal tells you which side of the face is "front" and which is "back". This is important because in realtime 3d graphics, faces are visible only from the front, not from the back.
The light blue lines are the normal-indicators. As you can see, all body parts except the head have the normals flipped (pointing inside).
Step 47 - Fix the rotation
It turns out this tutorial started with wrong orientation axis - the character is facing -Y axis while it should be facing +X axis (as Vido noted). To fix it, we need to rotate both around Y axis.
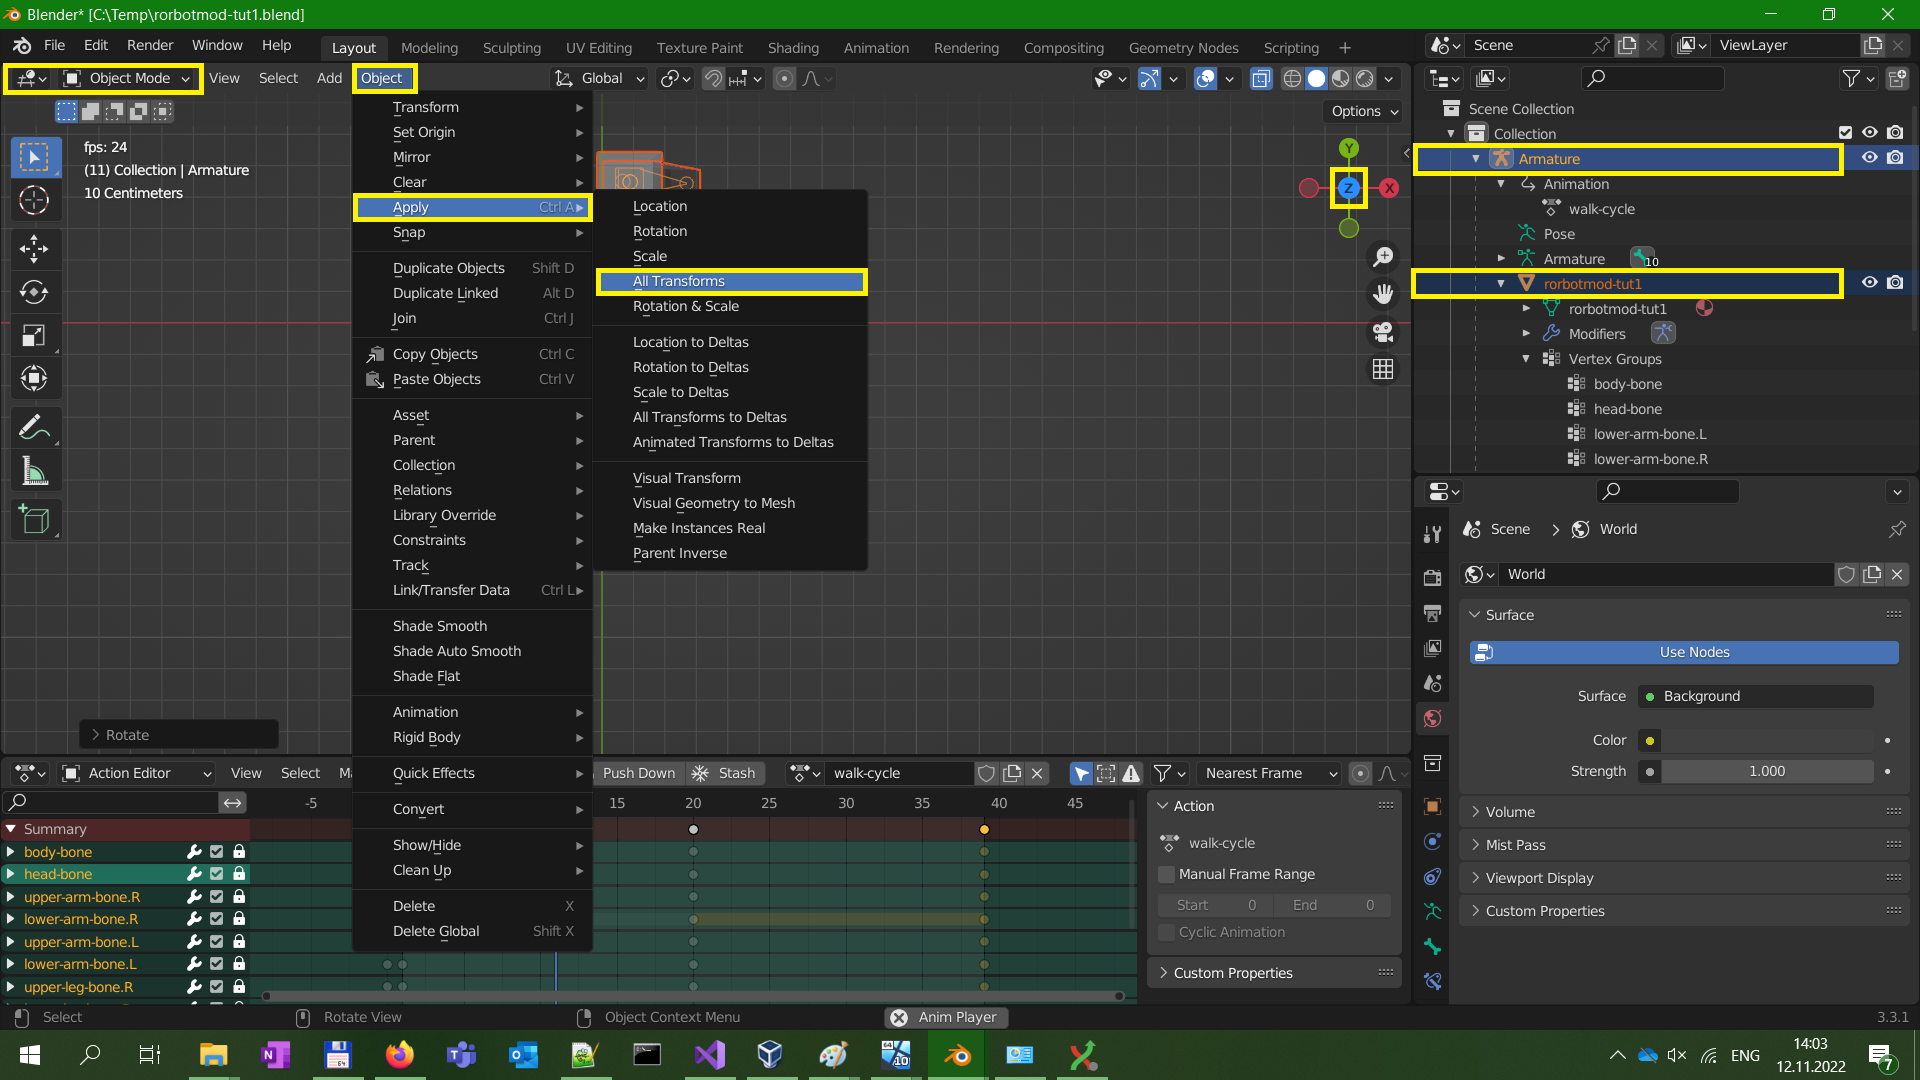
It turns out this tutorial started with wrong orientation axis - the character is facing -Y axis while it should be facing +X axis (as Vido noted). To fix it, we need to rotate both around Y axis.
- Go to object mode.
- Deselect everything using Alt+A, then select the armature and the mesh.
- Activate top-down camera by either pressing Numpad7 key or clicking Y on the gizmo.
- Activate rotation mode by hotkey R.
- Hold Ctrl to rotate in steps, and rotate exactly 90 degrees so that the character faces the X axis.
Step 48 - Export from Blender
You'll need blender2ogre Blender plugin: https://github.com/OGRECave/blender2ogre - follow the installation instructions in the README: https://github.com/OGRECave/blender2ogre#index. There's an image guide in my terrain tutorial: https://forum.rigsofrods.org/threads/making-a-map-from-scratch-how-hard-can-it-be.3746/#post-18323 (see step12).
To export, you'll need the OgreXmlConverter.exe utility from the OGRE SDK. There are 2 ways to obtain it:
* by installing the game from itch.io (either stable or dev builds work)
* by downloading the packaged OGRE SDK from their website: https://www.ogre3d.org/download/sdk/sdk-ogre
Image guide how to configure the Blender addon: https://forum.rigsofrods.org/threads/making-a-map-from-scratch-how-hard-can-it-be.3746/#post-18324 (see step13)
Finally, do the export using "(top menu) File > Export > Ogre (scene and mesh)". Make sure you use these settings:
- General/Swap axis: "xz-y" (tooltip: ogre standard)
- Scene/Export selected only: unchecked
Step 49 - create a character mod
Create a directory under 'Documents\My Games\Rigs of Rods\mods' and put the rorbotmod-tut1 mesh+skeleton files there. Finally we need the character description file. Copy this text and save it to file "rorbotmod-tut1.character":
Create a directory under 'Documents\My Games\Rigs of Rods\mods' and put the rorbotmod-tut1 mesh+skeleton files there. Finally we need the character description file. Copy this text and save it to file "rorbotmod-tut1.character":
Code:
; Beginner tutorial of character modding
; https://forum.rigsofrods.org/threads/beginner-tutorial-character-rorbot-mod-from-scratch-in-blender.3761/
; -----------------------------------------------------------------------------
;
; This file format lets you compose 'actions' from one or more
;  skeletal animations exported from a 3D modelling tool.
;  NOTE each action is evaluated separately, there is no either-or relation,
;  so you must set each anim's conditions to avoid conflicts.
;
; For explanation of individual parameters,
;  see file source/main/resources/character_fileformat/CharacterFileFormat.h
;
; For authoritative list of SITUATION_ and CONTROL_ flags,
;  see file source/main/gameplay/Character.h in the GitHub repo.
;
; Tip: in game, use 'Game animations' UI panel,
;  open it from top menubar >> Tools >> Character pose util >> tab 'game anims'
;
; -----------------------------------------------------------------------------

; Name displayed in the Selector UI - required
character_name "Tutorial character mod 1"

; Name of the mesh file - required.
mesh_name "rorbotmod-tut1.mesh"

; Scaling factor of the mesh - optional, default is 1.0 on all axes.
mesh_scale 1 1 1

begin_action
    game_description "walking forward"
    except_situation SITUATION_IN_DEEP_WATER
    except_situation SITUATION_DRIVING
    for_control CONTROL_MOVE_FORWARD
    except_control CONTROL_RUN
    anim_name "walk-cycle"
    playback_time_ratio 1.f
    playback_h_speed_ratio 1.f
end_action

begin_action
    game_description "walking backward"
    except_situation SITUATION_IN_DEEP_WATER
    except_situation SITUATION_DRIVING
    for_control CONTROL_MOVE_BACKWARD
    anim_name "walk-cycle"
    playback_time_ratio -1.f
    playback_h_speed_ratio 1.f
end_action
Last edited:
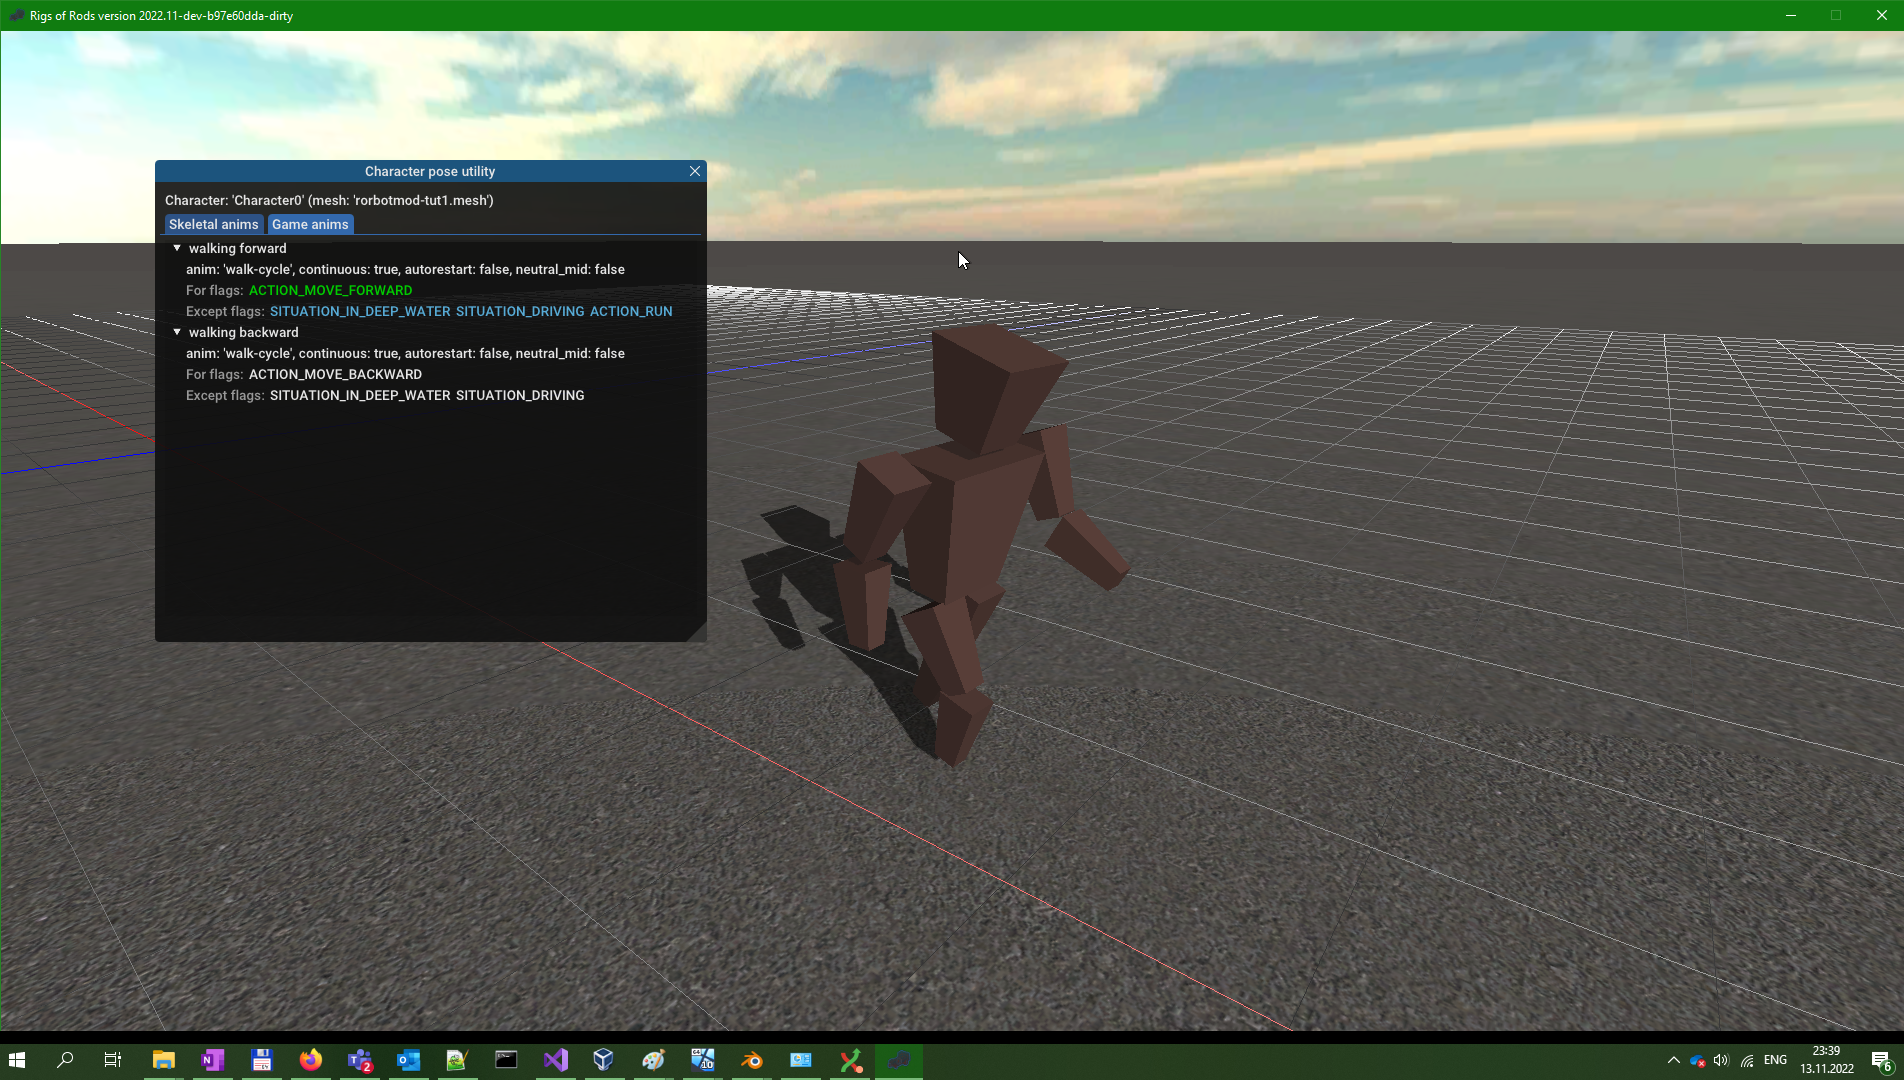
Step 50 - Test in game
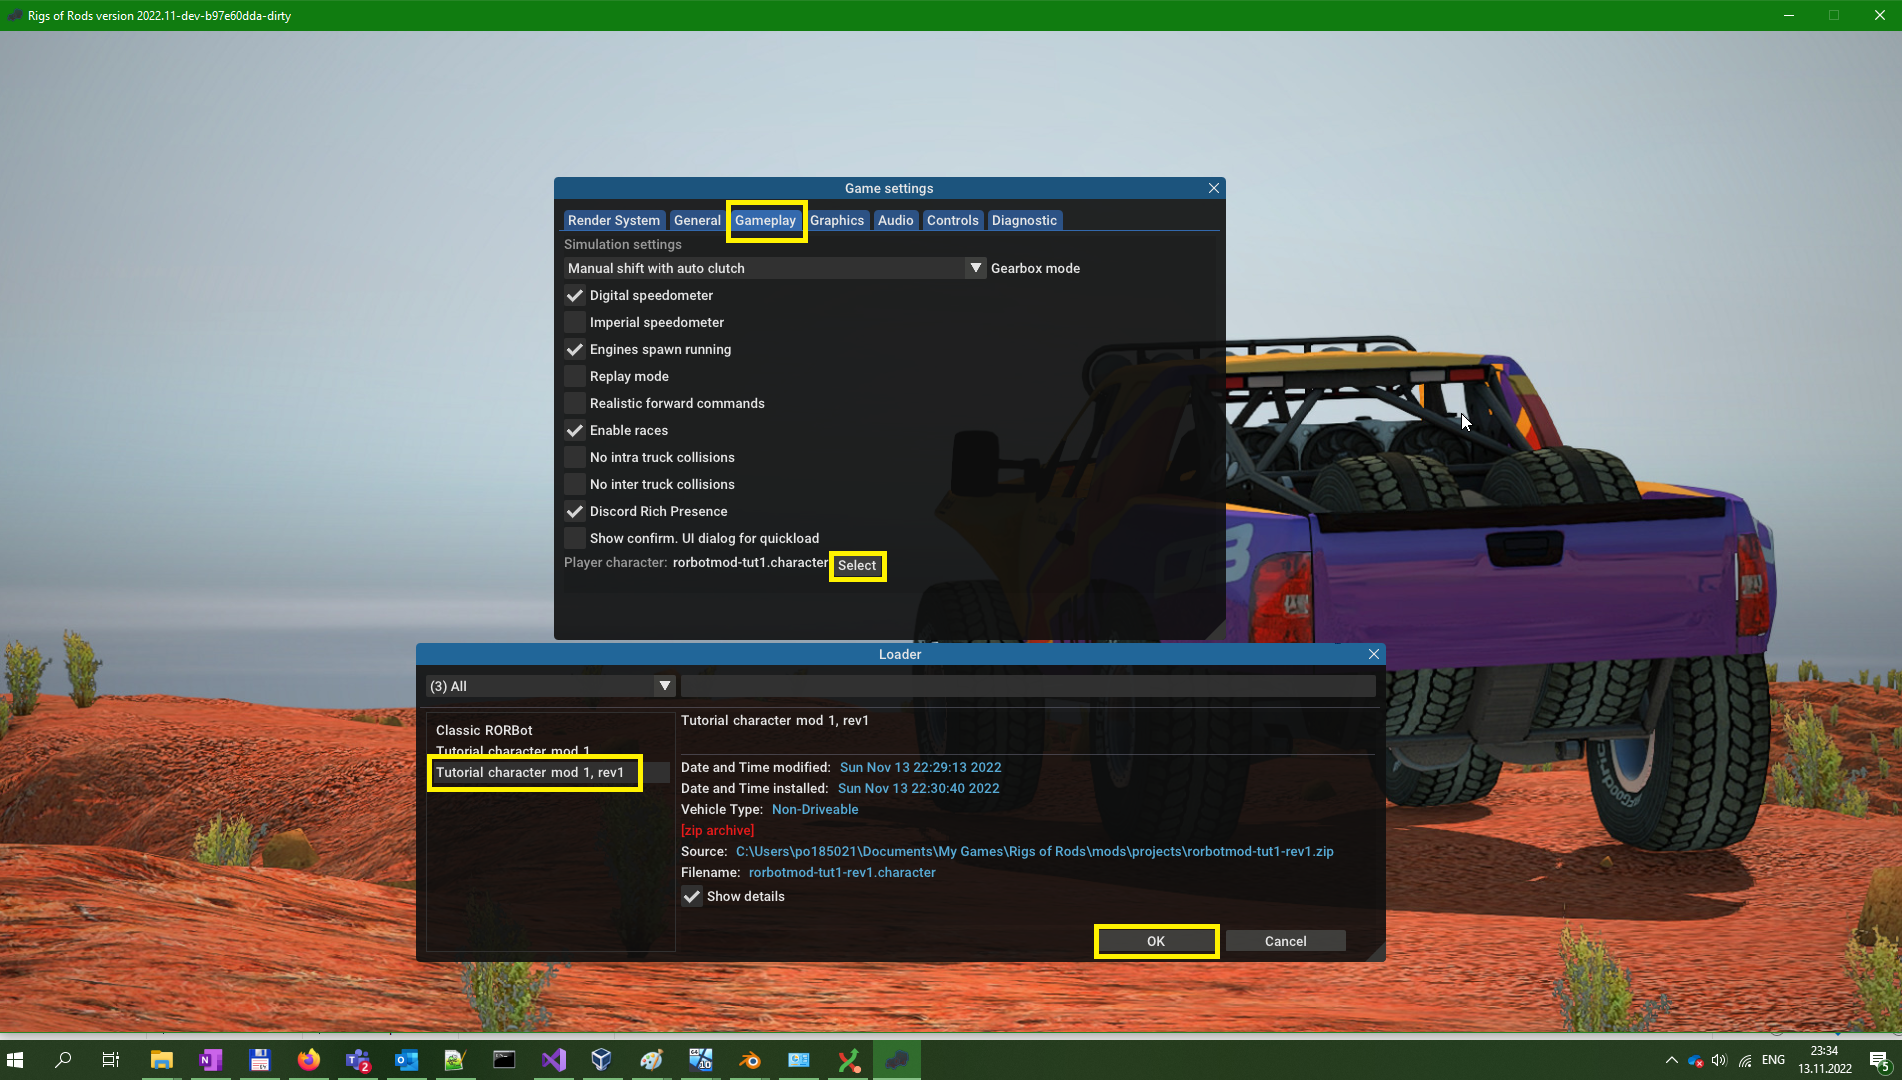
You need to download an experimental build from GitHub - visit https://github.com/RigsOfRods/rigs-of-rods/pull/2942, go to "Checks" tab and on the right, open the "Artifacts (2)" dropdown and download the zipped build.
I'm attaching the finalized tutorial character, just place it anywhere in the mods directory as usual. It includes the .blend file and README with CC0 (Creative commons copyleft) license - feel free to edit and publish it in any way you want.
Attachments
Great tutorial, should be very helpful for those interested in modding RoRBot. Hopefully you plan on adding your tutorials to the docs in the future 
One thing I'd like to add, the XMLConverter (along with the other tools) can also be downloaded from the Repository: https://forum.rigsofrods.org/resources/ogre-command-line-tools.967/
I created those packages as the XMLConverter hasn't been included with RoR for the past few versions (except for the Itch.io stable release, seems that was fixed recently)
Thanks for the feedback guys!
Docs: First the moddable rorbot PR needs to be concluded. That must definitely be documented. Tutorials like this one can be attractive only for those who like doing things from scratch.
OgreXmlConverter: I think we should bundle it with all ROR downloads. Blender is the go-to tool for modding here and blender2ogre exporter can automate the XML conversion, so having the converter in one place would simplify both writing tutorials and setting up your environment.
Making characters: think the makehuman blender plugin should ideally be the go-to solution for creating characters. I didn't research it yet but it looks very good. The alpha state shouldn't be an issue because I know Python and Blender internals (I coded blender plugin with UI before) so I'm able to patch the software if it has critical issues.
- Status
- Not open for further replies.
